Showing posts with label crochet. Show all posts

Sunday, September 27, 2015

Sunburst Granny Square ~ Nederlandse versie!!


Because I've been asked multiple times for a translation of the lovely Sunburst-pattern, this post will be in Dutch! :) For the original English pattern check out this post!

===

Lieve Nederlandstalige lezers! Ik krijg regelmatig de vraag of ik een vertaling heb van het patroon van de Sunburst Granny Square-deken. Aangezien ik mezelf in 2010 via Youtube heb leren haken en vervolgens direct ben begonnen met Engelstalige patronen, steken en tutorials, was het nog best een klusje om er een goed verhaal van te maken in het Nederlands!

Maar hier dan toch eindelijk de Nederlandse versie van het Sunburst-patroon! Veel plezier er mee :)
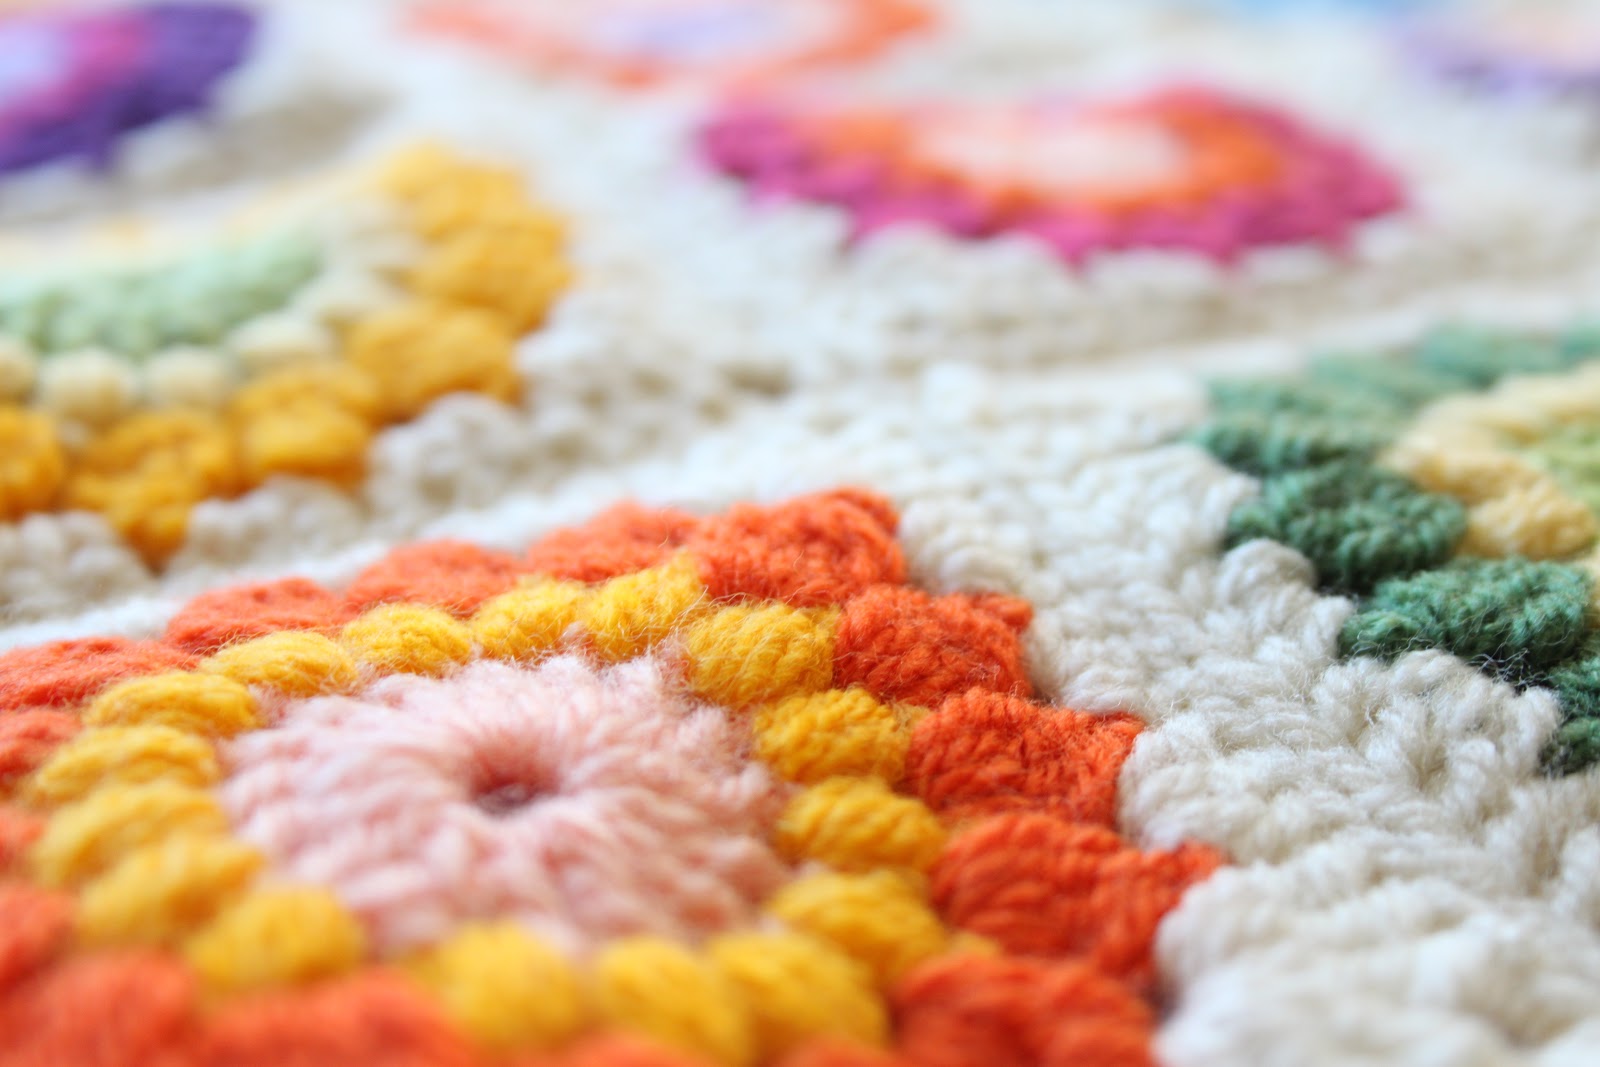

Steken

Losse: Sla de draad om de haaknaald en haal de draad door de lus.

Verbindings-losse: Sla de draad om de haaknaald, steek naald door ruimte van afgeronde Granny Square, haal de draad door de ruimte en door de lus.

Half stokje: Sla de draad om de haaknaald en steek de naald door een volgende steek. Sla weer de draad om de haaknaald en haal deze door de steek (3 lussen op haaknaald). Sla weer de draad om de haaknaald en haal de draad door de 3 lussen.

Stokje: Sla de draad om de haaknaald heen en steek de naald door een volgende steek. Sla weer de draad om de haaknaald en haal deze door de steek (3 lussen op haaknaald). Sla de draad om de haaknaald heen en haal deze door de 2 eerste lussen. Sla weer de draad om de haaknaald en haal deze door de 2 overgebleven lussen.

Puff-steek: *sla draad over haaknaald, steek naald in aangegeven steek en haal de draad door de steek* 3x (7 lussen op haaknaald). Sla de draad over de naald en haal door alle 7 lussen. Haak 1 losse om af te maken.

Cluster-steek: *sla draad over haaknaald, steek naald in aangegeven steek en haal de draad door de steek (3 lussen op haaknaald), haal draad over haaknaald en haal door 2 lussen* 4x (5 lussen op haaknaald). Sla de draad over de naald en haal door alle 7 lussen.

Dubbel stokje: Sla de draad 2x om de haaknaald en steek naald in aangegeven steek. Sla de draad over de haaknaald en haal door steek (4 lussen op haaknaald). Sla de draad over de haaknaald en haal door 2 lussen (3 lussen op haaknaald). Sla draad over de haaknaald en haal door 2 lussen (2 lussen op haaknaald). Sla draad over haaknaald en haal door de 2 laatste lussen op de haaknaald.


Voordat we beginnen eerst een opmerking over het maken van een deken van granny squares: je kan dit op twee manieren doen.
  1. Haak een x aantal vierkantjes (ronde 1 - 4) en hecht of haak deze vervolgens aan elkaar. 
  2. Haak een x aantal rondjes (ronde 1 - 3) en gebruik vervolgens de 'join-as-you-go' methode om de rondjes aan elkaar te haken met ronde 4.
Hieronder eerst het patroon voor een afgeronde Sunburst Granny Square (ronde 1 - 4)!

Sunburst Granny Square Patroon

Ronde 1
Start met een magische ring (of: ketting van 5 losse en verbind met een losse). Haak 3 losse (telt als eerste stokje) en haak vervolgens 15 stokjes in de ring. Verbind met losse aan de bovenkant van de eerste 3 losse en hecht af. (16 stokjes in totaal)

Ronde 2
Start met een nieuwe kleur, haak 1 losse en haak 1 puff-steek in diezelfde steek. Haak vervolgens een puff-steek in elke steek van de vorige ronde en hecht af. (16 puff-steken in totaal)

Ronde 3
Start met een nieuwe kleur, haak 2 losse in een van de ruimtes van de vorige ronde, *haak cluster-steek, 2 losse* in dezelfde ruimte en herhaal *cluster-steek, 2 losse* in elke ruimte van de vorige ronde. Verbind met een losse aan de eerste cluster-steek en hecht af. (16 cluster-steken in totaal)

Ronde 4
Met deze laatste ronde maak je van de cirkel een vierkant/granny square! Ik vind het zelf voor een deken het mooist om elke 4e ronde in dezelfde kleur te haken, bijvoorbeeld wit of zwart.

Start met de nieuwe kleur in een van de ruimtes van de vorige ronde, haak 4 losse (telt als eerste dubbel stokje) en - in dezelfde ruimte - haak nog eens 2 dubbele stokjes.

Rechte lijn: *haak in de volgende ruimte van de vorige ronde 3 stokjes, in de volgende ruimte 3 halve stokjes en in de volgende ruimte 3 stokjes*. Dit is de eerste rechte lijn van het vierkant!

Vervolgens:

Hoekje: *haak in de volgende ruimte van de vorige ronde 3 dubbele stokjes, 3 losse en nog eens 3 dubbele stokjes*.

Herhaal nu bovenstaande stappen *rechte lijn + hoekje* twee keer, en vervolgens nog eenmaal een *rechte lijn*. Je hebt nu in totaal 4x een rechte lijn en 3 keer een hoek gehaakt. Om de laatste hoek af te maken: haak 3 dubbele stokjes in dezelfde ruimte als de 1e 3 dubbele stokjes van deze ronde, haak 3 losse en verbind tot slot aan de bovenkant van de eerste 4 losse/dubbel stokje.

De Sunburst Granny Square is nu compleet :)

De Join-as-you-go methode (ronde 4)

Voor de duidelijkheid: bij deze methode haak je alle afzonderlijke Granny Squares 'on the go' aan elkaar vast. Je hebt om te beginnen 1 afgeronde Sunburst Granny Square (ronde 1 - 4) nodig en daarnaast (zoals hieronder) een voorraadje rondjes van ronde 1 - 3.


Voordat je begint met het in elkaar zetten van je dekentje is het natuurlijk leuk om na te denken over de kleurcombinaties van de Granny Squares in elke rij! Als je daar over uit bent kun je beginnen.

Pak een rondje (ronde 1 - 3) erbij en begin ronde 4 zoals gebruikelijk: 
  • Start met de nieuwe kleur in een van de ruimtes van de vorige ronde, haak 4 losse (telt als eerste dubbel stokje) en - in dezelfde ruimte - haak nog eens 2 dubbele stokjes. 
  • Vervolgens de eerste rechte lijn: *haak in de volgende ruimte van de vorige ronde 3 stokjes, in de volgende ruimte 3 halve stokjes en in de volgende ruimte 3 stokjes*. Dit is de eerste rechte lijn van het vierkant!
  • In de volgende ruimte haak je 3 dubbele stokjes (als het begin van de volgende hoek).

En nu komt het 'join' gedeelte dus pak de afgeronde Granny Square erbij waar je dit rondje aan vast wilt haken (dit kan dus de eerste afgeronde Granny Square zijn of een Granny Square die al aan het dekentje vast zit):
  • Haak 1 losse, steek de naald door een hoek van de afgeronde Granny Square, haal de draad over de naald en trek door de hoek EN de lus op de haaknaald. De twee Granny Sqaures zitten nu aan elkaar vast met een 'verbindings-losse'. 
  • Haak vervolgens 1 losse, en in dezelfde ruimte van het rondje waar je eerder de 3 dubbele stokjes haakte, haak nog eens 3 dubbele stokjes. 

(Met andere woorden: in plaats van een hoek met *3x dubbel stokje, 3 losse, 3x dubbel stokje* haak je bij het verbinden *3x dubbel stokje, 1 losse, 1 verbinding-losse door de hoek van de bestaande Granny Square, 1 losse, 3x dubbel stokje*. Hierbij een paar foto's uit een andere tutorial om te illustreren wat de bedoeling is:)


Haak vervolgens weer een verbindings-losse: Steek de haaknaald door de volgende ruimte van de afgeronde Granny Square, haal draad over haaknaald en trek draad door de ruimte en de lus op de haak. (Het nieuwe rondje zit nu op 2 plekjes vast aan de afgeronde Granny Square!)

Ga vervolgens door met de rechte lijn van ronde 4 maar voeg telkens een verbindings-losse toe om te verbinden aan de afgeronde Granny Square:

  • Haak 3 stokjes, 1 verbindings-losse
  • Haak 3 halve stokjes, 1 verbindings-losse
  • Haak 3 stokjes, 1 verbindings-losse

En de volgende hoek:

  • Haak 3 dubbele stokjes
  • 1 losse
  • 1 verbindings-losse
  • 1 losse
  • Haak 3 dubbele stokjes
Als de nieuwe Granny Square op alle nodige plekken vast zit aan de afgeronde Granny Sqaure maak je gewoon ronde 4 af zoals gebruikelijk.

~

En zo maak je een dekentje van de Sunburst Granny Squares! :) Ik wens jullie veel haak-plezier!


Thursday, August 27, 2015

Sunburst Coaster Pattern


Hey Blogland! Question: can you ever have too many coasters? I'll help you with the answer: NOPE ;)

Coasters are great for using under cups, teapots, plants and so on, and it's always practical to have a few different sizes lying around. So I thought I'd share a pattern I made up the other day, featuring the first few rounds of the Sunburst Granny Pattern. Hope you enjoy!!

Sizes & yarn
I used a 4mm crochet hook and Schachenmayr SMC Bravo. This yarn is 100% acrylic, machine washable and it comes in many, many great colors. The finished coaster is about 16 cm/6 inches across.

Stitches
Single crochet (sc): insert hook in stitch, yarn over and pull through stitch (2 loops on hook), yarn over and pull through two loops on hook.

Half double crochet (hdc): yarn over, insert hook in next stitch, yarn over and pull loop through stitch (3 loops on hook). Yarn over and pull through all three loops on hook.

Double crochet (dc): yarn over, insert hook in next stitch, yarn over and pull loop through stitch (3 loops on hook). Yarn over and pull through two loops on hook (2 loops remaining on hook). Yarn over and pull through two remaining loops on hook.

Double crochet two together in same space (dc2tog): yarn over, insert hook in stitch, yarn over and pull loop through stitch (3 loops on hook). Yarn over and pull through 2 loops (2 loops on hook). Yarn over, insert hook hook in same space, yarn over and pull loop through stitch (4 loops on hook). Yarn over and pull through 2 loops (3 loops on hook). Yarn over and pull through 3 loops.

Puff stitch: *yarn over, insert hook in indicated stitch and draw yarn through stitch* three times (7 loops on hook). Yarn over and pull through all loops on hook. Chain 1 to lock.

Cluster stitch: *yarn over, insert hook in next stitch and pull up a loop, yarn over and pull through 2 loops* 4 times (5 loops on hook). Yarn over and pull through all loops on hook.

===
Note: scroll down to the bottom of this post for a more compact version of the pattern!
===

Round 1
Start with a magic circle.

Chain 3 (counts as first dc) and crochet 11 dc's into the magic circle. Join with slip stitch to the beginning chain 3 and fasten off. (12 dc's total)


Round 2
Attach next color, chain 1, puff stitch in same space between dc's of previous round. Continue with crocheting a puff stitch in each space from previous round and join with a slip stitch to the first puff stitch. Fasten off. (12 puff stitches in total) 


Round 3
Attach next color, chain 2, (cluster stitch, chain 2) in the same space and repeat *cluster stitch, chain 2* in each space between puff stitches of previous round. Join with a slip stitch to the beginning cluster stitch. Fasten off. (12 cluster stitches in total) 


Round 4
Attach next color, chain 3 (counts as first dc) and in same space between cluster stitches of previous round crochet 2 dc's, ch 1. Repeat *3 dc, ch1* in every space. Join with a slip stitch to the beginning ch3 and fasten off. (36 dc's in total)


Round 5
Attach next color, chain 3 and in same space between dc's of previous round crochet 1 dc (counts as first dc2tog). Now repeat dc2tog in every space between every dc of previous round. Join with a slip stitch to the beginning ch 3 and fasten off.  (36 stitches in total) 


Round 6
Attach next color in space between dc2tog's of previous round, chain 2 (counts as first hdc) and in same space crochet 1 hdc. Repeat *2 hdc's* in every space between dc2tog's of previous round. Join with a slip stitch to the beginning ch 2 and fasten off. (72 hdc's in total)


Round 7
Attach next color in space between hdc's of previous round and chain 1. In the same space crochet 1 sc and repeat *1sc* in every space between hdc's of previous round. Join with a slip stitch to the beginning ch 2 and fasten off. (72 sc's in total)


And that's it! Quick and easy, and you can combine colors endlessy to create different sets of coasters. Enjoy!!!


Sunburst Coaster Pattern (compact version)

Round 1: Start with a magic circle.Chain 3 (counts as first dc) and crochet 11 dc's into the magic circle. Join with slip stitch to the beginning chain 3 and fasten off. (12 dc's total)

Round 2: Attach next color, chain 1, puff stitch in same space between dc's of previous round. Continue with crocheting a puff stitch in each space from previous round and join with a slip stitch to the first puff stitch. Fasten off. (12 puff stitches in total) 

Round 3: Attach next color, chain 2, (cluster stitch, chain 2) in the same space and repeat *cluster stitch, chain 2* in each space between puff stitches of previous round. Join with a slip stitch to the beginning cluster stitch. Fasten off. (12 cluster stitches in total) 

Round 4: Attach next color, chain 3 (counts as first dc) and in same space between cluster stitches of previous round crochet 2 dc's, ch 1. Repeat *3 dc, ch1* in every space. Join with a slip stitch to the beginning ch3 and fasten off. (36 dc's in total)

Round 5: Attach next color, chain 3 and in same space between dc's of previous round crochet 1 dc (counts as first dc2tog). Now repeat dc2tog in every space between every dc of previous round. Join with a slip stitch to the beginning ch 3 and fasten off.  (36 stitches in total) 

Round 6: Attach next color in space between dc2tog's of previous round, chain 2 (counts as first hdc) and in same space crochet 1 hdc. Repeat *2 hdc's* in every space between dc2tog's of previous round. Join with a slip stitch to the beginning ch 2 and fasten off. (72 hdc's in total)

Round 7: Attach next color in space between hdc's of previous round and chain 1. In the same space crochet 1 sc and repeat *1sc* in every space between hdc's of previous round. Join with a slip stitch to the beginning ch 2 and fasten off. (72 sc's in total)


Saturday, March 7, 2015

Crochet Pear Tutorial :)


I hadn't come around to hanging my Pirum Parum-poster by Fine Little Day in my new home yet, so when my new - PINK! :) - sofa arrived and I finally got around to it, I realized the two looked perfect together :) 

And suddenly I felt the strong urge... to crochet a pear!! 


Aren't they cute together? :) I used patterns I found online so this 'tutorial' will simply be a quick walkthrough of how I made the pear, linking to the patterns I've used. Give credit where credit is due, right?! ;)

Pear Pattern
I used this free pattern by June Gilbank on Planet June, which makes for a great pear-shaped plushie! :) Beware of round 5 though: for some reason I kept ending up with a few stitches too many, even on a retry. No idea if it was me or the pattern… but I eventually fixed it with an invisible decrease to end up with 18 stitches for rounds 6-9! Problem solved ;)

Yarn & hook size
By using a chunky grey yarn I had lying around (hook size 8) my pear ended up much bigger than the one in the tutorial - just the way I had planned :) So basically you can use any yarn and matching hook size you'd like to create a bigger or smaller pear. Note that if you decide to go for a bigger pear, you'll need to start stuffing your plushie a few rounds before the patterns tells you to, otherwise the hole will be too small to get the stuffing in properly!

Eyes & nose
For the eyes I used 8mm plastic safety eyes and for the nose a 15 mm plastic safety nose. Please note that the links refer to a random Etsy-shop to give you an example - I bought mine at a local shop ages ago so please search online or in your area where to find them in your country.

Cheeks
With a smaller yarn and hook size (I used a 3,5 mm hook with matching yarn):

Start with a Magic Circle
Round 1: Single crochet 6 times into the Magic Circle and join with a slip stitch to the first sc (6 st)
Round 2: 2 sc into every stitch from round 1 (12 st)
Join with a slip stitch to first stitch from round to and fasten off

Leave a long end of yarn to stitch the cheeks unto your pear. 

And last but not least… adding a Leaf
For the leaf I used this free pattern by Crochet with Raymond, and the same yarn and hook size (3,5mm) I used for the cheeks.

~

And there you have it!! Quite a simple little project really… with a very cute result :)

Hope you enjoy!

~Jenny


Thursday, April 25, 2013

Seventies Granny Square Blanket Tutorial


Hey everyone! Today I'm sharing another tutorial with you: the Super Retro Seventies Granny Square Blanket. Or, in short, the Seventies Blanket ;)

This blanket came to life because I wanted to make something for our new moss green sofa. I wanted to make a blanket with a true retro feel about it, and finally decided to combine bright colors with black borders, creating a real seventies vibe. I absolutely love this combination!!

At the same time I needed squares that were fast and easy to make, but didn't look the part. I absolutely adore the Sunburst Granny Squares, but they are pretty time consuming and when you suffer from back aches, like me, crafting for long periods of time is just not an option anymore. So I needed an alternative.

In short: I love my Seventies Blanket and I would love to share with you how I made it. I'm also joining as-I-go this time around to save even more time and give the blanket a good 'flow', so I will include this method of joining granny squares in this tutorial.

Hope you enjoy!

Sizes & yarn
The Seventies Blanket consists of four rounds measuring about 4 inches in size. I used a 4mm crochet hook and Schachenmayr SMC Bravo. This yarn is 100% acrylic, machine washable and it comes in many, many great colors.

Stitches
Double crochet (dc): yarn over, insert hook in next stitch, yarn over and pull loop through stitch (3 loops on hook). Yarn over and pull through two loops on hook (2 loops remaining on hook). Yarn over and pull through two remaining loops on hook.

Double crochet two together (dc2tog): yarn over, insert hook into stitch and pull loop through stitch (3 loops on hook). Yarn over and pull yarn through 2 loops (2 loops left on hook). Yarn over, insert hook into same stitch, pull yarn through (4 loops on hook), yarn over, pull yarn through 2 loops (3 loops remaining on hook). Yarn over and pull through 3 remaining loops on hook.

Treble stitch (trbl): Yarn over hook twice, insert hook into next stitch. Yarn over hook and draw yarn through stitch (4 loops on hook). Pull yarn through two loops (3 loops remaining on hook). Yarn over and draw through two loops (2 loops remaining). Yarn over and draw through the last two loops on hook.

Round 1
Start with a magic circle. Chain 3 (counting as the first double crochet stitch) followed by a double crochet stitch and then chain 1. You now have one 'cluster'. Next, crochet 2 dc's and chain 1 (this is the second cluster).

Repeat *crochet 2 dc's followed by a chain 1* four more times until you have six of these clusters. Join with a slip stitch to the top of the beginning chain 3 and pull the yarn of the magic circle to close the circle.


Round 2
Attach the next color with a slip stitch in one of the chain 1 spaces from the first round. Chain 3 (counting as the first dc) followed by a dc stitch, then chain 1. In the same space, crochet 1 dc2tog and then chain 1.

Move on to the next chain 1 space from the first round and crochet: dc2tog, chain 1, dc2tog, chain 1, all in that same space.

Now, repeat *dc2tog, chain 1, dc2tog, chain 1* in the next four chain 1 spaces from the first round. Join with a slip stitch to the top of the beginning chain 3. Your granny circle should now look like this:


Round 3
Attach the next color with a slip stitch in one of the chain 1 spaces from the second round. Chain 3 (counting as the first dc) followed by 2 more dc's in the same spcae, then chain 1.

In the next chain 1 space from the second round, crochet 3 dc's and then chain 1.

Repeat *3 dc's, chain 1* ten times until every chain 1 space is filled. Join with a slip stitch to the top of the beginning chain 3. You're granny circle now looks like this:


Round 4
For my Seventies Blanket I used black yarn for every fourth round to create that great retro vibe.

Now, the next steps might sound a bit tricky, but it's not as bad as it seems: you're basically going to turn your Seventies rounds into squares. In the picture below you can see which stitches you'll use for the straight lines (pink) and the corners (blue).


So, to start round 4 attach the next color with a slip stitch in one of the chain 1 spaces from the third round. Chain 4 to count as the first treble stitch and then crochet 2 treble stitches in that same space.

In the next chain 1 space from the third round, *crochet 3 dc's, move over to the next chain 1 space and again crochet 3 dc's*. You now made one of the four straight lines of your square. 

Next, you'll make your first corner: all in the next chain 1 space from the third round crochet 3 treble stitches, chain 3, and crochet another 3 treble stitches. 

Repeat this sequence (straight line + corner) two times, then repeat from * to * (straight line) once. 

To finish your last corner: crochet 3 treble stitches in the same space as the beginning treble stitches, chain 3 and join with a slip stitch to the top of the beginning chain 4.

Fasten off and your Seventies Granny Square is done!!


Moment of choice: crochet together or join as-you-go?
If you are not joining as-you-go, just finish a whole bunch of complete granny squares (using rounds 1 - 4) separately and then sew or crochet the squares together. 

For this blanket, I will be joining the squares as-I-go. It's quicker and gives blankets a better 'flow' in my opinion. 

Joining as-you-go
To join as-you-go you will need to make one complete Seventies Square using rounds 1- 4 and then a whole bunch of granny circles using rounds 1 - 3. Make as many as you need, want, can...


... until you have enough to start your blanket! :)


Next you'll have to decide which way to arrange your granny squares. It helps to lay them out, try different combinations and take a step back before you decide. 

As you can see I've already started my blanket and am preparing to add another row by displaying the granny rounds in the order I want to join them. 


So, are you satisfied? Sure?! ;)


Then let's start joining already! Remember you've already made one complete Seventies Granny with four rounds: we'll call this the existing square and this will be the square you'll attach a second square (the new square) to. It doesn't really matter if you are starting your blanket or adding a row like I am: if you get the principle of joining you're there.

So for the new square, start exactly the same as with any fourth round: attach the next color with a slip stitch in one of the chain 1 spaces from the third round. Chain 4 to count as the first treble stitch and then crochet 2 treble stitches in that same space. In the next chain 1 space from the third round, crochet 3 dc's, move over to the next chain 1 space and again crochet 3 dc's. In the next chain 1 space crochet 3 treble stitches. 

You will now have this:


Next, grab the existing square you want to join your new square to because the joining is about to start.

On the new square proceed by chaining 1 and then sticking your hook through a corner of the existing square from front to back, like this:


Wrap the yarn around your hook...

... and pull it through the corner of the existing square and the loop on your hook. The two squares are now joined by a slip stitch.

To complete the corner of your new square: chain 1, and in the same space as the other 3 treble stitches, crochet 3 treble stitches.

Your new square will now look like this:

You get it? Instead of chaining 3 for the corner, you chain 1, attach the squares with a slip stitch, and chain 1 again. You're basically just replacing 1 chain with 1 slip stitch.

Now, your next steps will be:

Straight line
- slip stitch in next space of existing square
- 3 dc's in the next space of the new square

- slip stitch in next space of existing square
- 3 dc's in the next space of the new square

Corner
- slip stitch in next space of existing square
- 3 treble stitches in the next space of the new square
- chain 1
- slip stitch to existing square
- chain 1
- 3 treble stitches in the same space of the new square

And there your have it: your squares are joined!


Now, depending on how far along you are with your blanket, either continue joining the left side of the new square to an existing square, or - like this case - just continue round 4 as usual. Fasten off, and you're done :)


When you've joined your squares add extra stitches in the places where four squares meet to keep them neatly in place.


And there you go. You can now join as many Seventies Squares as you wish to make a small or big blanket, using fast but pretty squares! 

I hope you enjoyed this tutorial. I sure enjoyed writing it :)


Sunday, January 6, 2013

Sunburst Granny Square Blanket Tutorial


Hey everyone! Once upon a time I made a Sunburst Granny Square blanket for my niece, took some pictures and posted them on my old blog. And oh what a lot of question I got about it!! In particular:
1) What's the pattern?
2) What yarn did you use?
3) How did you join the squares?

So I thought it was finally time to write a proper post about one my favourite crafty projects of all time: The Sunburst Granny Square blanket!!


Now, the first thing I have to mention is that I did not design this from scratch. It is based on a pattern by Priscilla Hewitt, and the original pattern contains more rounds. I've posted the link to this original pattern severel times but apparently it doesn't work for a lot of you. If you are interested in the original pattern, please try this link - hopefully it will work.

Sizes & yarn
I used four rounds to make the Sunburst Granny Squares for the blanket, and they are about 4 inches in size. I used a 4mm crochet hook and Schachenmayr SMC Bravo. This yarn is 100% acrylic, machine washable and it comes in many, many great colors.

Stitches
Half double crochet (hdc): yarn over, insert hook in next stitch, yarn over and pull loop through stitch (3 loops on hook). Yarn over and pull through all three loops on hook.

Double crochet (dc): yarn over, insert hook in next stitch, yarn over and pull loop through stitch (3 loops on hook). Yarn over and pull through two loops on hook (2 loops remaining on hook). Yarn over and pull through two remaining loops on hook.

Puff stitch: *yarn over, insert hook in indicated stitch and draw yarn through stitch* three times (7 loops on hook). Yarn over and pull through all loops on hook. Chain 1 to lock.

Cluster stitch: *yarn over, insert hook in next stitch and pull up a loop, yarn over and pull through 2 loops* 4 times (5 loops on hook). Yarn over and pull through all loops on hook.

Treble stitch (trbl): Yarn over hook twice, insert hook into next stitch. Yarn over hook and draw yarn through stitch (4 loops on hook). Pull yarn through two loops (3 loops remaining on hook). Yarn over and draw through two loops (2 loops remaining). Yarn over and draw through the last two loops on hook.

Round 1
I prefer to start with a magic circle, but if you'd rather start with a chain: chain 5 and join with a slip stitch. Next, chain 3 to count as the first double crochet and work 15 more double crochet stitches into the ring. Join with a slip stitch to the top of the beginning chain 3. (16 double crochet stitches in total) Fasten off.


Round 2
Attach next color with a slip stitch to any dc, chain 1, puff stitch in the same stitch and in each dc around. Join with a slip stitch to the first puff stitch. (16 puff stitches in total) Fasten off.


Round 3
Attach next color with a slip stitch in the chain 1 space of any puff stitch, chain 2, (cluster stitch, chain 2) in the same space and in each chain 1 spaces around. Join with a slip stitch to the beginning cluster stitch. (16 cluster stitches in total) Fasten off.


Moment of choice: crochet together or join as-you-go?
Now you have a choice to make. If you plan to join the squares - to make a blanket for example - then you have to make a decision about how to join the squares before you start round 4. You have two options: finish all the squares seperately and sew or crochet the squares together* (in which case you can proceed with round 4) or join the squares as-you-go* (in which case you can proceed to make a required amount of three-round granny squares/rounds which you can eventually join).

* For a tutorial about crocheting squares together, click here. For a tutorial about joining squares as-you-go, click here. Both tutorials are from the wonderful Lucy of Attic24. 


For the blanket pictured in this post I used the first option (crocheting the finished squares together). As you can see in the above picture it looked very neat up close, but the overall effect was in my opinion a bit too wobbly (see picture below). This is probably because I did something wrong (like crocheting the squares together to tight?) but in any case I nowadays prefer to join my squares as I go, which gives a better 'flow' to the blanket in my opinion.


Round 4
Whatever you choose, you will need round 4 sooner or later. I prefer to use the same color (white or black) for every fourth round of every square to create unity, but of course you can use any color you want.

To start round 4 attach your next color with a slip stitch to any chain 2 space. Chain 4 to count as the first treble stitch and then crochet two treble stitches in the same space. Now, the next steps might sound a bit tricky, but it's not as bad as it seems: you're basically going to turn your Sunburst rounds into squares. In the picture below you can see which stitches you'll use for the straight lines (pink) and the corners (blue).


First crochet *3 dc in the next chain 2 space, 3 hdc in the next chain 2 space and 3 dc in the next chain 2 space*. You now made one of the four straight lines of your square. Next, you'll make your first corner: all in the next chain 2 space crochet 3 treble stitches, chain 3, and another 3 treble stitches. Repeat this sequence (straight line + corner) two times, then repeat from * to * (straight line) once. To finish your last corner: crochet 3 treble stitches in the same space as the beginning treble stitches, chain 3 and join with a slip stitch to the top of the beginning chain 4.

Fasten off and your Sunburst Granny Square is done!!


I had a lot of fun writing this tutorial, and if it proves at all helpful to anyone out there then that's a nice bonus ;) If you've made a Sunburst Granny Square blanket yourself, please post a link in the comments; I would love to see it! :)